Introduction to Taking Screenshots on Mac
Are you ready to capture those unforgettable moments on your Mac screen with just a few simple clicks? Taking screenshots on a Mac is a handy skill that can come in handy for work, school, or simply capturing funny memes. In this blog post, we’ll guide you through different methods for taking screenshots on your Mac and show you some cool tricks to customize your captures. Let’s dive in and make your screenshot game strong!
Different Methods for Taking Screenshots on Mac
Are you looking to master the art of taking screenshots on your Mac? Several methods can help you capture exactly what you need with ease. One popular way is using the keyboard shortcut Command + Shift + 3 or Command + Shift + 4, which allows you to snap the full screen or a selected area. quickly
Another option is the Grab application, which offers more advanced features for capturing specific windows or menus. If you’re looking for even more customization and functionality, exploring third-party screenshot tools can provide additional options like timed captures and editing capabilities.
With these various methods at your disposal, you can choose the most convenient one based on your preferences and needs. Whether it’s a simple keyboard shortcut or a feature-rich application, capturing screenshots on your Mac has never been easier!
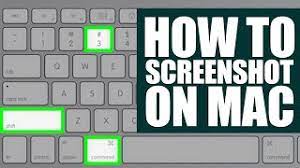
A. Using the keyboard shortcut: Command + Shift + 3/4
When it comes to capturing what’s on your Mac screen swiftly, using keyboard shortcuts is like having a secret weapon up your sleeve. The Command + Shift + 3/4 shortcut is a game-changer in the world of screenshots.
By pressing Command + Shift + 3, you can capture the entire screen in one go. this is perfect for those moments when you want to snap everything displayed on your monitor effortlessly
If precision is more your style, try Command + Shift + 4. This nifty shortcut allows you to select and capture a specific area of your screen with pinpoint accuracy. Just drag and release!
There is no need for complicated software or extra steps—keyboard shortcuts make screenshotting on a Mac quick and effortless. Your digital memories are just a keystroke away!
B. Using the Grab application
Are you looking to improve your screenshot game on your Mac? Look no further than the Grab application, a hidden gem in the macOS system. With Grab’s user-friendly interface and versatile features, capturing screenshots becomes a breeze.
To access Grab, navigate to Applications > Utilities > Grab. Once open, you can capture the entire screen, a selected window, or even a specific portion of the screen with precision.
With Grab’s timer feature, you can set delayed captures for those moments when timing is everything. Need more flexibility? Customize shortcuts for various types of screenshots within the app preferences.
Whether it’s for work or play, using Grab elevates your screenshot game by offering convenience and functionality at your fingertips. Give it a try and see how easy capturing screens on your Mac can be!
C. Using third-party screenshot tools
If you’re looking to add more versatility and features to your screenshot game on Mac, exploring third-party screenshot tools can be a game-changer. These tools often offer additional functionalities that go beyond the basic options provided by Mac’s built-in features.
With third-party tools, you can expect enhanced editing capabilities, advanced annotation options, and even cloud integration for seamless sharing of your screenshots. Some popular choices include Snagit, Skitch, Lightshot, and Monosnap –, each offering a unique set of features t
Whether you need precise pixel measurements or want to blur out sensitive information before sharing your screenshots, these third-party tools can cater to a wide range of user needs. Plus, many of them offer customizable keyboard shortcuts for quick and efficient capturing processes.
By incorporating third-party screenshot tools into your workflow, you can elevate your screenshot-taking experience and streamline your visual communication efforts with ease. Also, Click
Customizing Your Screenshots
Customizing your screenshots on a Mac is a fun and creative way to make them truly unique. One way to customize your screenshots is by changing the default save location. Instead of cluttering your desktop with screenshots, you can choose a specific folder in which they can be saved. Adding annotations and effects can also enhance your screenshots. Whether you want to highlight important information, add arrows or text, or even blur out sensitive data, these tools allow you to personalize your images.
By taking advantage of customizing options, you can make your screenshots more visually appealing and tailored to suit your needs. Experiment with different settings and features to create screenshots that stand out and effectively convey the message you want to share.
A. Changing the save location
When it comes to taking screenshots on your Mac, customizing where they are saved can be a handy feature.
By default, screenshots are usually saved on the desktop, but what if you prefer a different location for better organization? Fear not!
To change the save location of your screenshots, use the Terminal app and enter a command to redirect them to a folder of your choice. This way, you can keep your desktop clutter-free and neatly arrange all your screen captures in one place.
Whether you create specific folders for work-related images or categorize them by projects or themes, having control over where your screenshots land can streamline your workflow and make finding them later a breeze.
So go ahead, explore this option, and tailor it to suit your individual preferences and organizational needs. Your screenshot game just got more efficient!
B. Adding annotations and effects
When it comes to adding annotations and effects to your screenshots on Mac, the possibilities are endless.
You can easily highlight important information using the Markup feature. This feature allows you to draw shapes, add text, and even create signatures directly on your screenshot. ThIts perfect for emphasizing specific details or providing additional context.
Furthermore, you can experiment with different filters and editing tools to enhance the overall look of your screenshot. Whether you want to adjust the colors, add a blur effect, or crop the image to focus on a particular area – there are plenty of options available at your fingertips. Also, Click
By customizing screenshots with annotations and effects, you can make them more visually appealing and informative. So don’t hesitate to get creative and explore all the tools that macOS has to offer for enhancing screenshots.
Troubleshooting Common Issues
Encountering issues while trying to take screenshots on your Mac can be frustrating, but fear not—solutions are within reach. One common problem users face is the inability to locate their screenshots after capturing them. If this happens, check your desktop or designated screenshot folder for the saved images.
Another issue that may arise is when the keyboard shortcut fails to work. In such cases, try restarting your Mac and ensuring that no conflicting software is interfering with the screenshot function. Additionally, keeping your operating system updated can help resolve compatibility issues.
If your screenshots appear blurry or distorted, adjusting the screen resolution settings on your Mac could improve the quality of the captured images. Remember to troubleshoot step by step and explore online forums for more specific guidance tailored to your particular concern.
Additional Tips and Tricks
When it comes to taking screenshots on your Mac, there are some additional tips and tricks that can enhance your experience. One handy tip is to utilize the timer function when capturing a screenshot. This allows you to set up your screen exactly how you want before the snapshot is taken.
Another helpful thing is knowing how to take a screenshot of a specific window or menu. By pressing Command + Shift + 4 and then hitting the Spacebar, you can select the window or menu you want to capture with precision.
If you find yourself frequently taking screenshots, creating keyboard shortcuts for different types of screenshots can save time and streamline your workflow. Customizing these shortcuts in System Preferences under Keyboard settings can make the process even more efficient.
Exploring various third-party screenshot tools available for Mac users can also open up new possibilities for editing and sharing your captures seamlessly. These tools often provide advanced features like cloud storage integration and instant sharing options at your fingertips.
Conclusion
Conclusion
Taking screenshots on your Mac is a simple and helpful feature for various purposes. Whether you prefer using keyboard shortcuts, the Grab application, or third-party tools, there are options to suit your preferences.
Customizing your screenshots by changing the save location or adding annotations and effects can help make them more visually appealing and organized. Troubleshooting common issues, such as not being able to find where your screenshots are saved or e, encountering errors, will ensure a smoother experience.
Remember to explore additional tips and tricks to enhance your screenshot-taking skills further. With practice and creativity, you can master the art of capturing moments on your Mac effortlessly. So go ahead and start taking those snapshots with confidence!